
Use software to create your own 3D model in 5 minutes 【LOGO animation • Fusion360】
- bricknet105
- Sep 28, 2023
- 4 min read
Recently, I was trying to use After Effects (AE) to create some eye-catching logo animations, but in the process, I encountered some challenges. Maybe you have also faced this situation: when you were trying to animate using After Effects, you suddenly needed to incorporate some special 3D models into your work. |
What will you do at this time?
First, of course, search online to see if there are any suitable 3D models available. However, most of the models found may not be available directly and may even require payment. For me, I needed to find a 3D model of the building block bricks, but after searching on the Internet, I couldn't find a suitable 3D model file that could be imported directly into After Effects.
In order to realize my idea, I used Fusion 360 3D modeling software. This software allows me to design and create my own 3D models, and perfectly integrates them into the LOGO animation I want to create. This time, let me briefly share how to use fusion360 to make 3D model building blocks!
Preparation
1. Fusion 360 software (installation tutorial) | 2. How do you want to draw the model (We found the style of building block bricks as an example) |
 |  |
Let’s get started when you’re ready
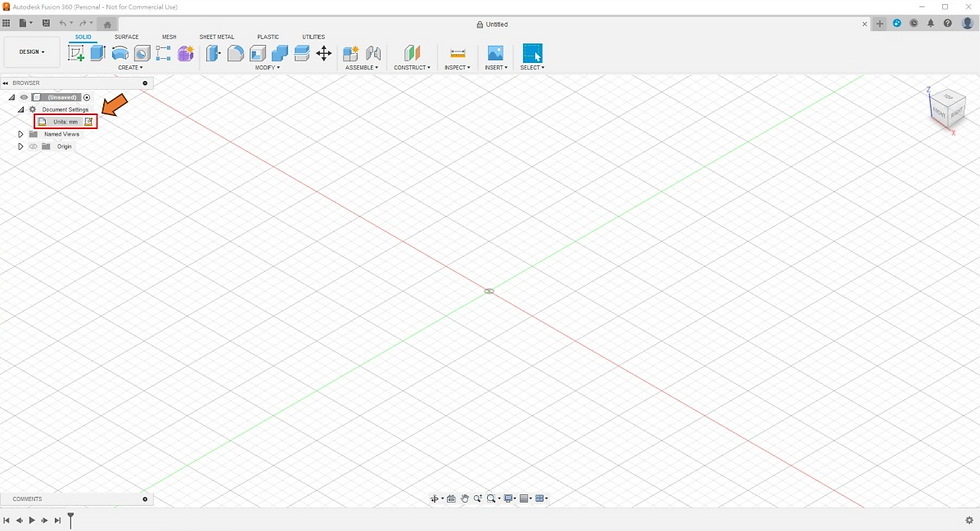
Open your Fusion 360 program. Don’t rush to start production after opening it. First check the "Units" in "Document Settings" on the left to confirm whether it is the same as the scale of the model (mm here) before starting! If it doesn't match, click "Change Active Units" to change it to the correct size.
Click "Create Sketch" in "SOLID" above to create the first object.
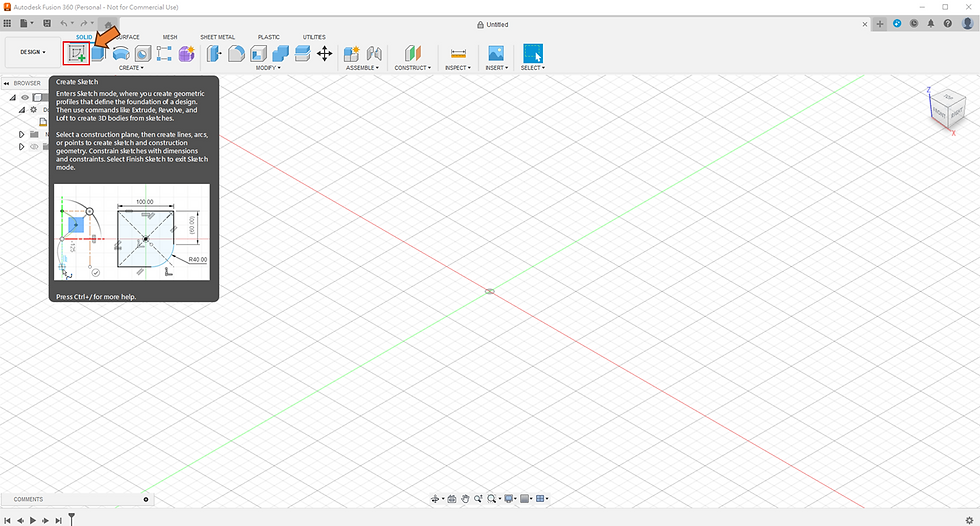
After clicking, you will see several different faces appearing in the center for you to choose from. This time we will choose the bottom face (X-Y plane) to build our object.

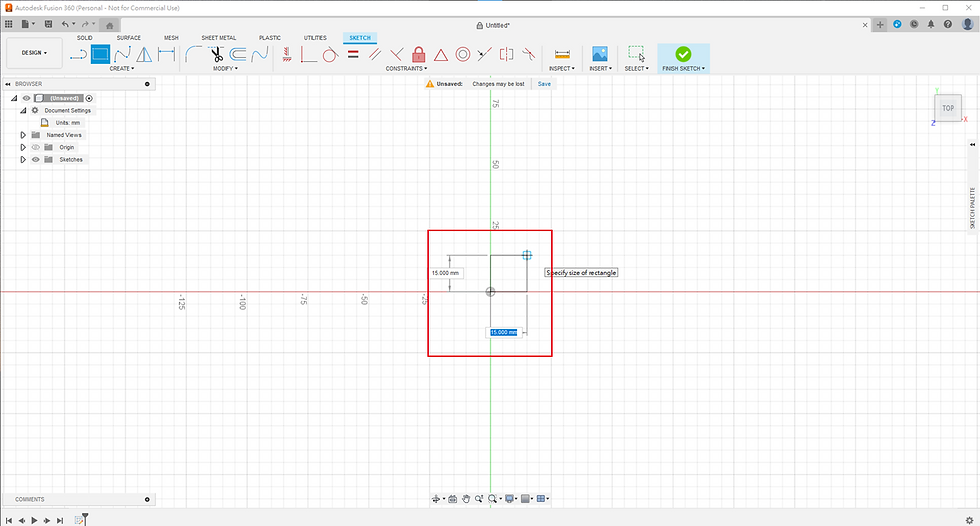
The perspective will be converted to a top-down perspective. Select the "2 Point Rectangle" in the "SKETCH" above to create the main part of the building block.

In order to build the building block at the origin, after selecting "2 Point Rectangle", first click the origin part and then use the mouse to drag the rectangle size.
***Here is a little trick. You can directly enter the size of the side you want. After entering one side, press the "Tab key" on the keyboard to enter the size of the other side.
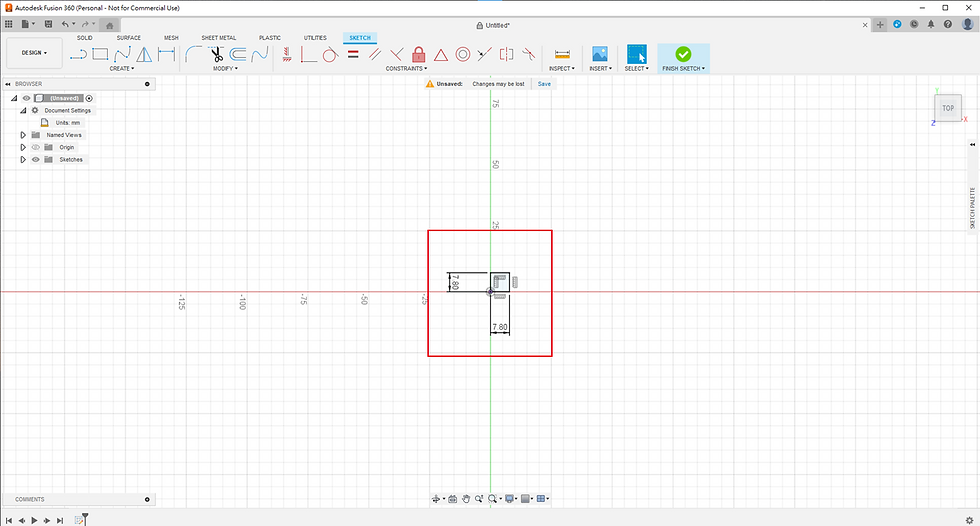
In order to match the size of the building blocks, both sides will be set to 7.8 mm. After completion, you will get the following result!
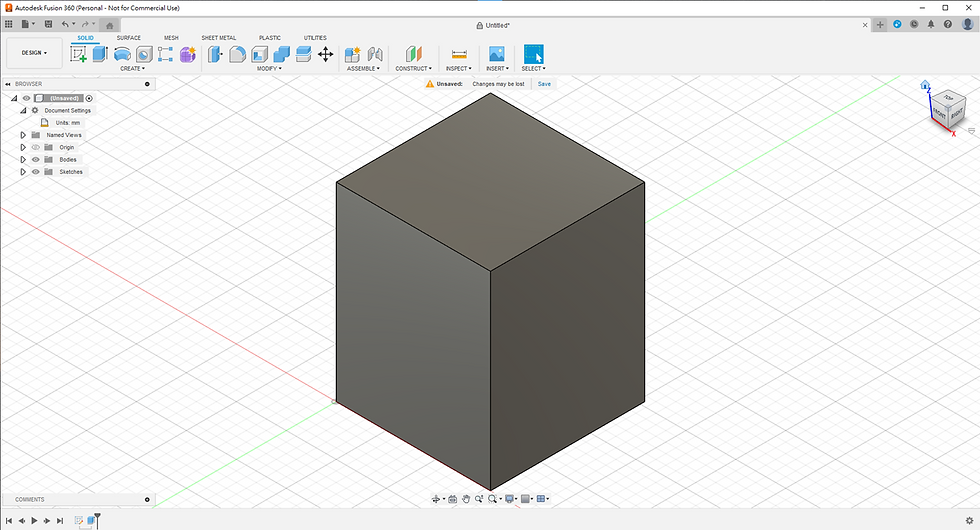
The next step is to make our building blocks grow taller, using the "Extrude" function in "SOLID" above.
After entering the height 9.6 (mm) we need, we can complete the production of the building block body.

After the main body is completed, the upper part of the cylinder will be made
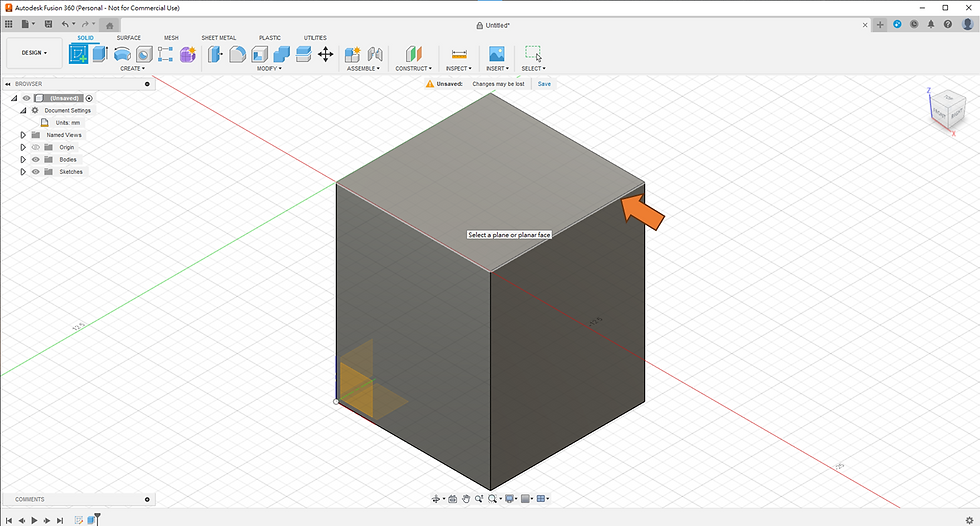
Use "Create Sketch" in "SOLID" above to complete. After clicking, 3 sides will appear for you to choose.
Special attention needs to be paid here, otherwise the cylinder may grow in the wrong place!
When selecting, be sure to select the top section, so that your cylinder will grow directly above.
After clicking, you will return to the front view. This time we want to add the upper cylinder. Select "CREATE>Circle>2-Point Circle" in "SKETCH" above to create a circle.
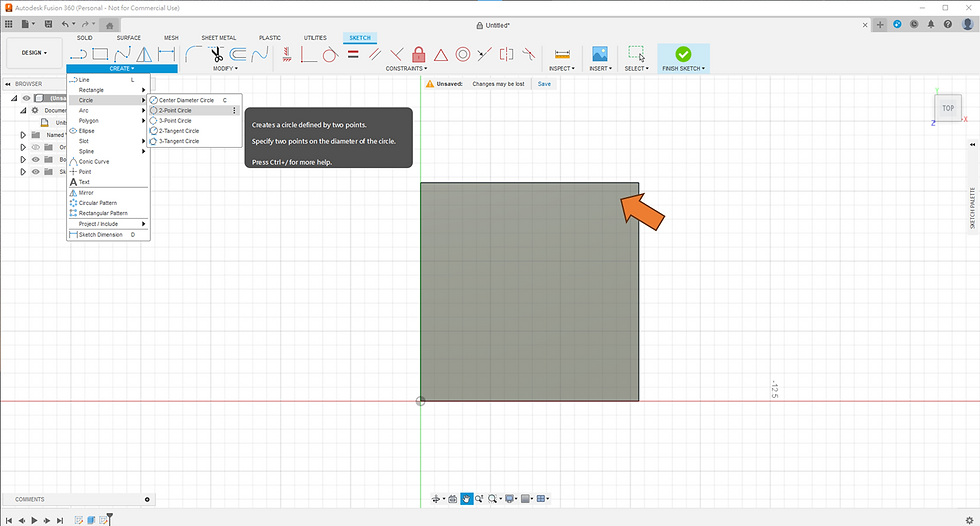
After selection, click anywhere on the block to create a circle. Don’t worry about the blocks becoming crooked, we can adjust them later!
For the size part, we fill in the diameter 4.8 (mm) to complete our cylinder.

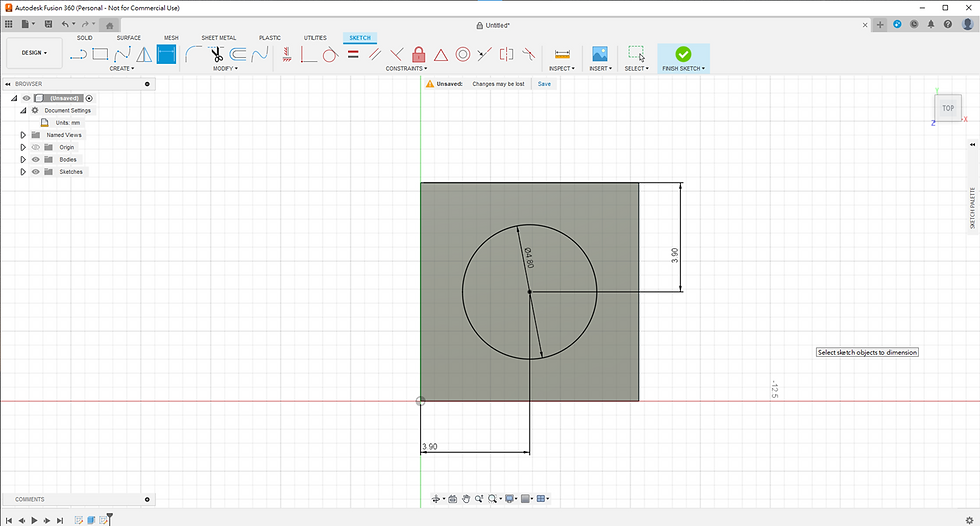
This time we are going to use the "Sketch Dimension" tool in "SKETCH" above.
As long as we enter a number, it can automatically adjust the distance between two points for us. In this way, we can set the distance between the center of the circle and both sides to further complete the position setting.

The method of use is as follows, click on the center part of the circle, then click on the edge of the building block and set the distance. In order to place our circle in the center, the distance will be set to 7.8/2=3.9(mm)!

The same method is also applied to the other side, and the circle can be placed at the center point! If you find the auxiliary lines next to or above it annoying, you can click on it and press "Delete" to delete it.
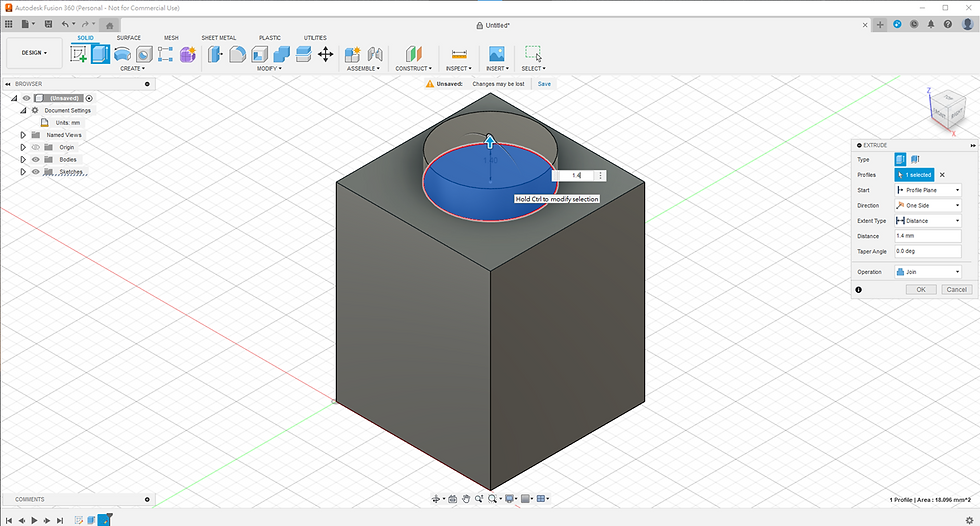
Use the "Extrude" function in "SOLID" above and enter the protrusion height of 14 (mm) to complete the production of the cylinder.
Remember to select the circle when clicking so that the cylinder can grow correctly!
If you are not very demanding about details, a simple building block is basically complete! The subsequent optimization steps can make our building block more refined~

3D object model basic optimization
First, dig holes under the blocks! Use the "Shell" tool in "SKETCH" above.

After selecting the "Shell" function, click on the face directly below the building block to dig a hole. Here you need to enter a value to set the distance from the edge. Here we set it to 1.49 (mm).

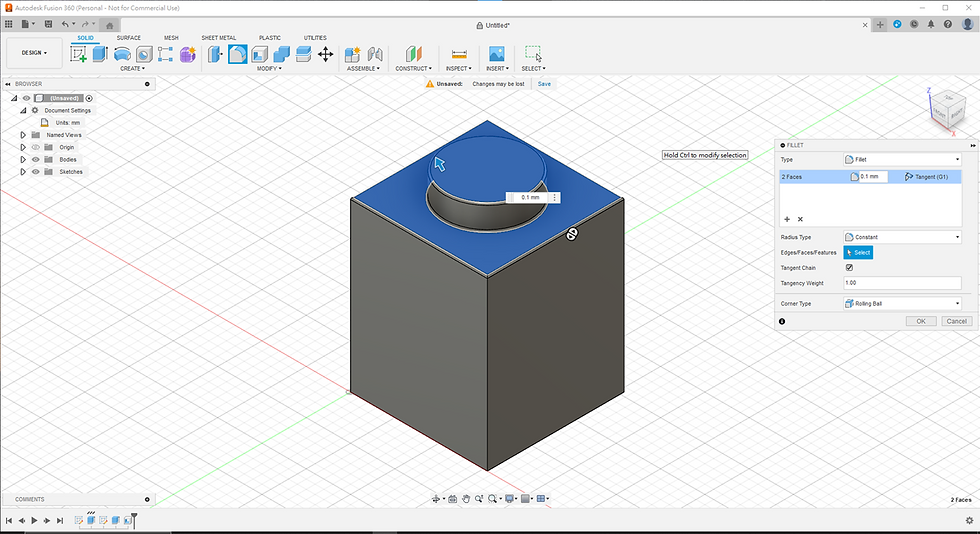
Now the building blocks are getting closer and closer to reality. The last step is to make the edges of the building blocks more detailed. Here we will use the "Fillet" function in "SOLID" above.

Select the part where you want to soften the edge, enter the number after selection, and you are done! We set the value to 0.1 (mm). You can test this parameter yourself and set it to the most suitable situation.
A complete 3D building block model is completed!

Finally, don’t forget to archive your files, and file from Fusion 360 needs to be placed in the cloud

You should still remember that our original purpose was to throw the file into After Effects for animation production!
The most commonly used files in this part are .obj files. Select "Export" in "File" on the upper left to export the file.

Enter the file name and change the "Type" to the "OBJ Files (*.obj)" option. After completion, wait for Fusion 360 to process and you can get the file!

Conclusion
In this tutorial, we learned how to use Fusion 360 to create our own 3D model, and made our own OBJ file 3D model, which added infinite possibilities to our animations. In the future, we will continue to teach how to use these homemade 3D models to make your LOGO animation more unique.
If you are passionate about this topic, you can follow BrickNet's blog, we will regularly share new teachings and techniques. In addition, if you have any questions or suggestions, please feel free to share them with us in the message area. We are happy to listen and help answer questions and grow together with everyone.


Comments